Loom tidy
- Details
- Hits: 26142
Brought the car down the 250 mile journey to my new home area. Apart from the tyres initially rubbing on the front spring, caused by being a bit flat so I pumped them up, absolutely no problems in the baking heat! Fair play for a 25 year old car. I do think my blower is stuck on hot though, so an open window down the motorway was a nice source of cool air. I'll look into that at some point.
Tracking is obviously way out, I need it set up properly since I changed the suspension, so it wanders to the left unless you hold the wheel. Plus the tyres are knackered and wheels badly out of balance, so bad wobbles weren't great. But for the 4 hour engine drone, (very noisey in the cockpit with no insulation and headlining!), I almost managed to drown it out with headphones and radio from my phone.
Also been up working on the car a little today for the first time in 3 months, now I finally have it back. After a suggestion of fabric loom tape, I got stuck in to tidying up the battery terminals and internal wiring. Looks a hell of a lot neater and surely more reliable!


There's still (despite some trimming) loads of excessive / un-required wiring in the glovebox area, I'll only take bits out piece by piece that obviously don't need to be there - it used to be a massive birds nest of wire. Unless someone comes and points what wires to cut.
Also noticed something odd, it's cut out twice stalling trying to drive over a small ramp into the garage it' parked at. No problem. But starting up again is tricky, it seems to not quite get enough momentum to fire properly. I need to look at the fuel filter - it's not obvious to me which pipes go to the engine and which to the pump, but I think it's the wrong way round. Hopefuly that's what is causing that hiccup. When I replaced it, it definately went in the same way it was arrowed before but I'm not sure it was correct in the first place.
Sourced some wheels and track tyres, so that's positive news. I'll also be ordering a new timing belt kit and water pump, so I'll be doing a coolant flush at last while I'm there. Looking at booking a test session at Pembrey early August, but only after it gets tracking and suspension alignment sorted.
E30 Front coilovers
- Details
- Hits: 8086
I was chuffed how quickly the rear coilovers had gone on, now to the front struts. I knew I had to get a ball joint seperator (I went the fork route - bad idea!) and spring compressors.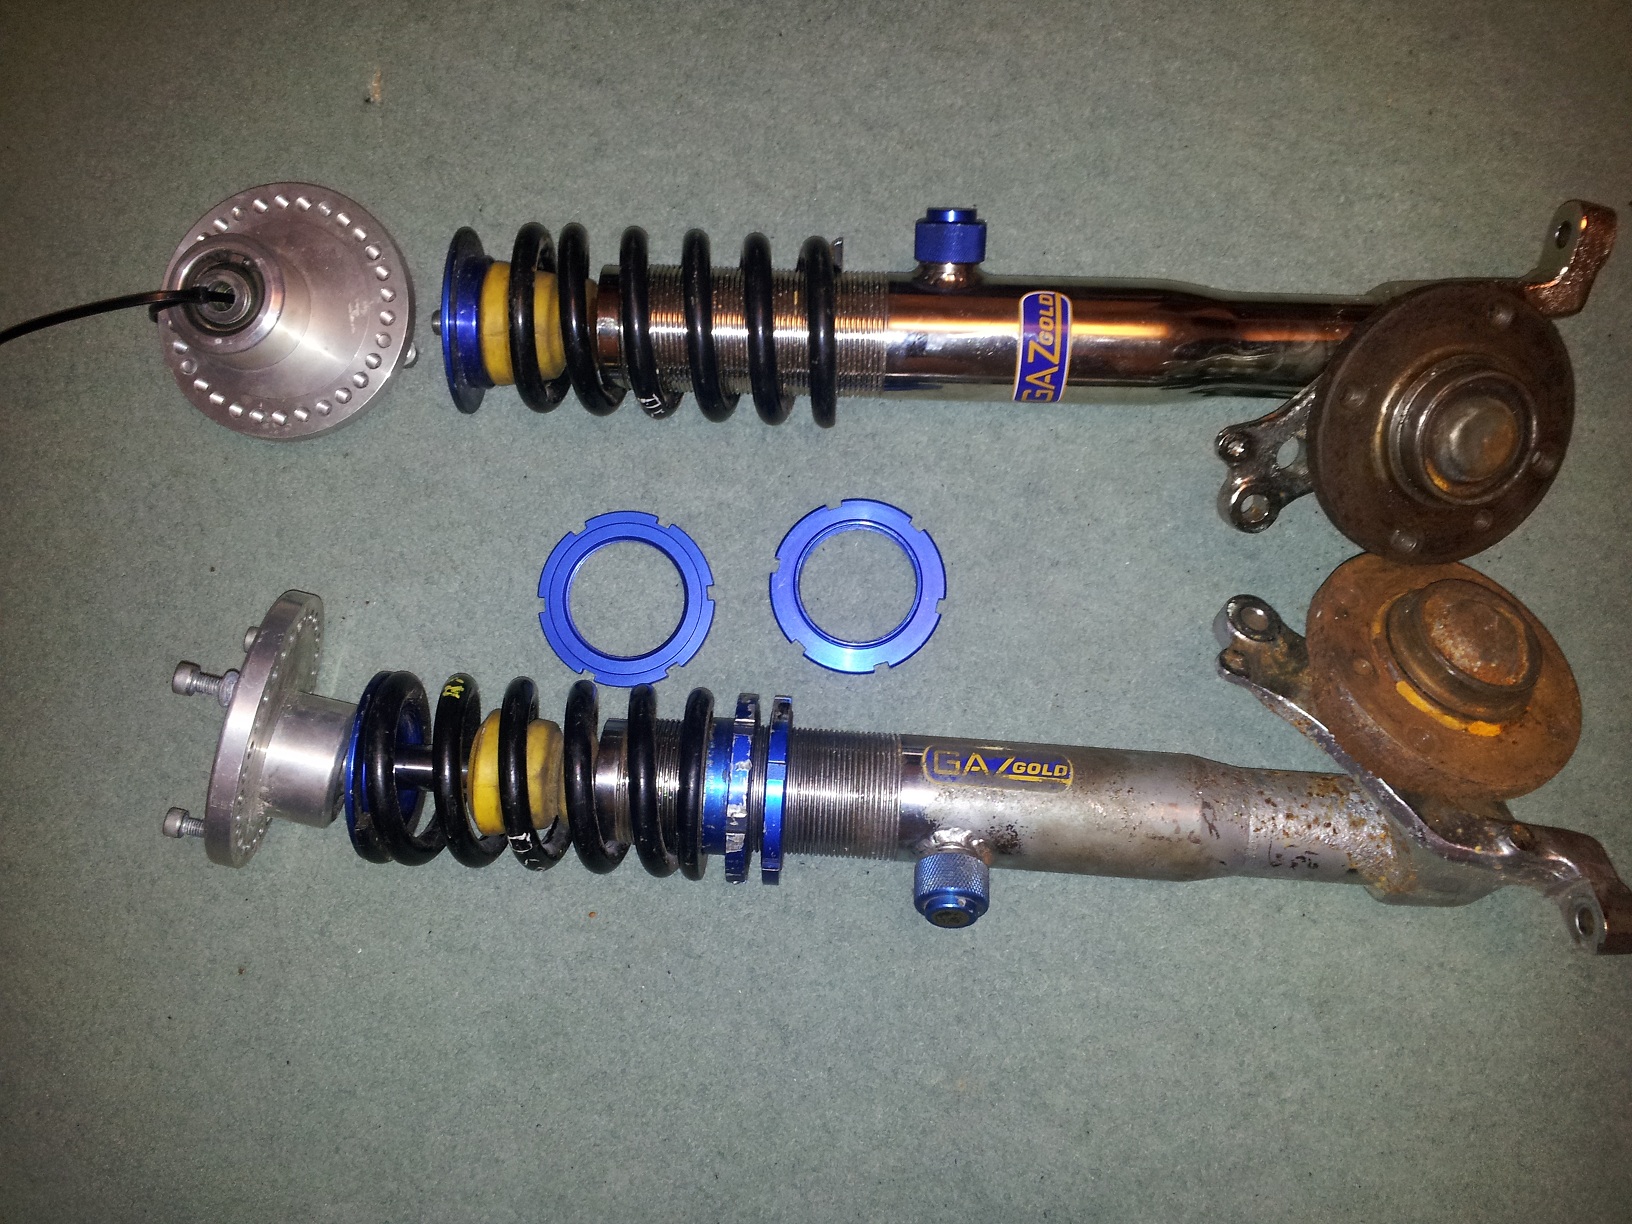
Now the fronts are a nightmare and straight away the reason why is because of the ball joints at the bottom of the struts. I went to Halfords for a fork type splitter, and wish I'd researched this art a bit more, of which there's plenty of generic ball joint splitting advice on t'nterweb. Mind you everyone seems to know what the best method is and they are often different!
What's certainly true is fork type splitters are good at knackering your ball joint rubber and seals. This side is bad enough but the passenger side ended up utterly mullered, and probably not a lot of grease is left in the wishbone joint...So I'll be getting new tie rod ends and control arms at some stage, and having seeen what they do I'd like the peace of mind anyway. The joints are very wobbly anyway, and that shows years of wear. They should be quite stiff.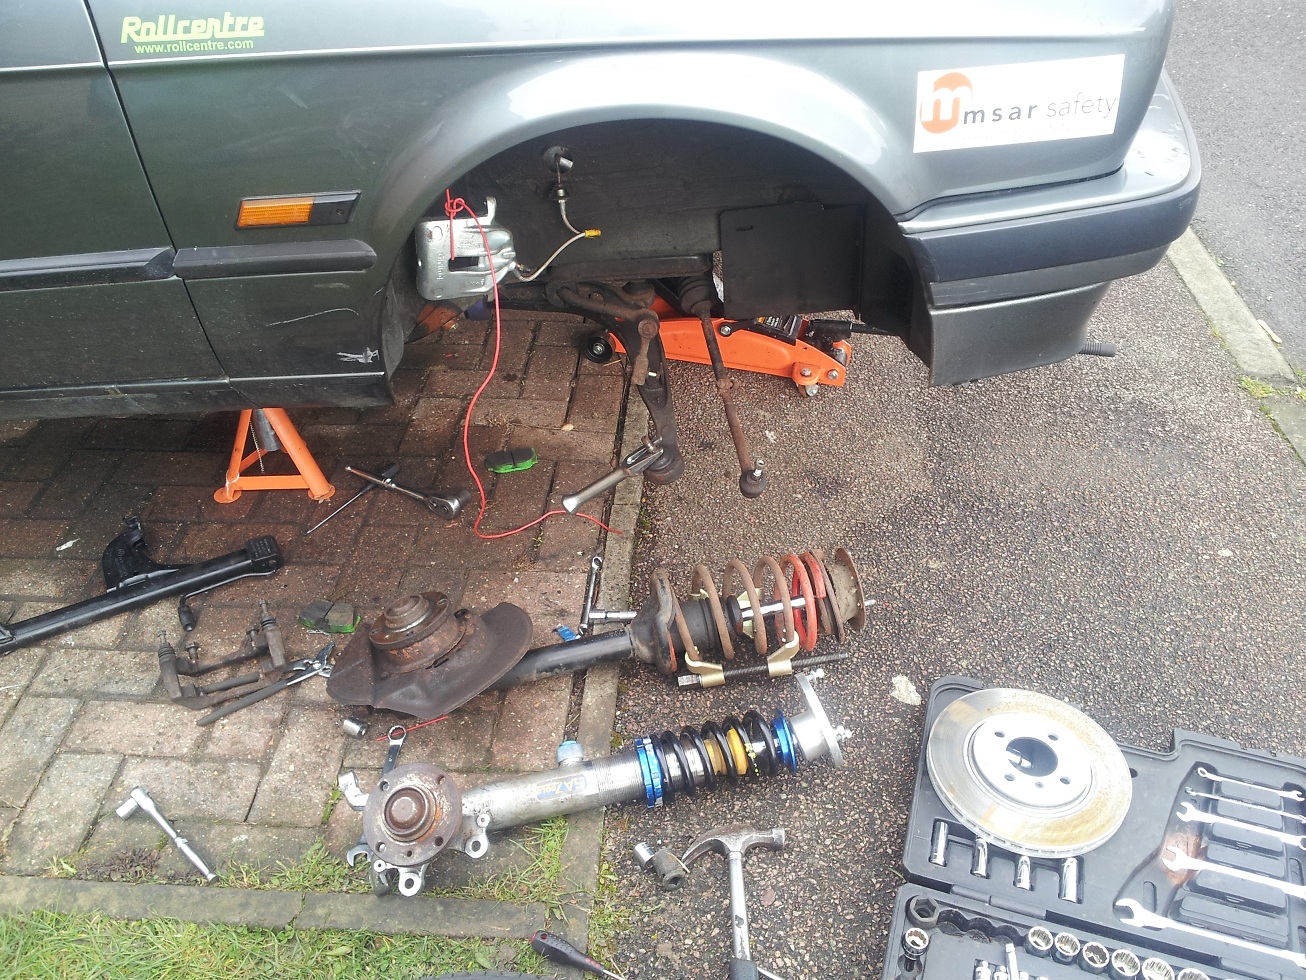
Got the strut off, old vs new. The spring compressors are a pain in the arse to set up right as the threaded bar is long and simply chews into the underseal in the wheel arch! Hnece they aren't exactly on opposite sides as they should be, so I only compressed them enough to take the spring load and a bit more.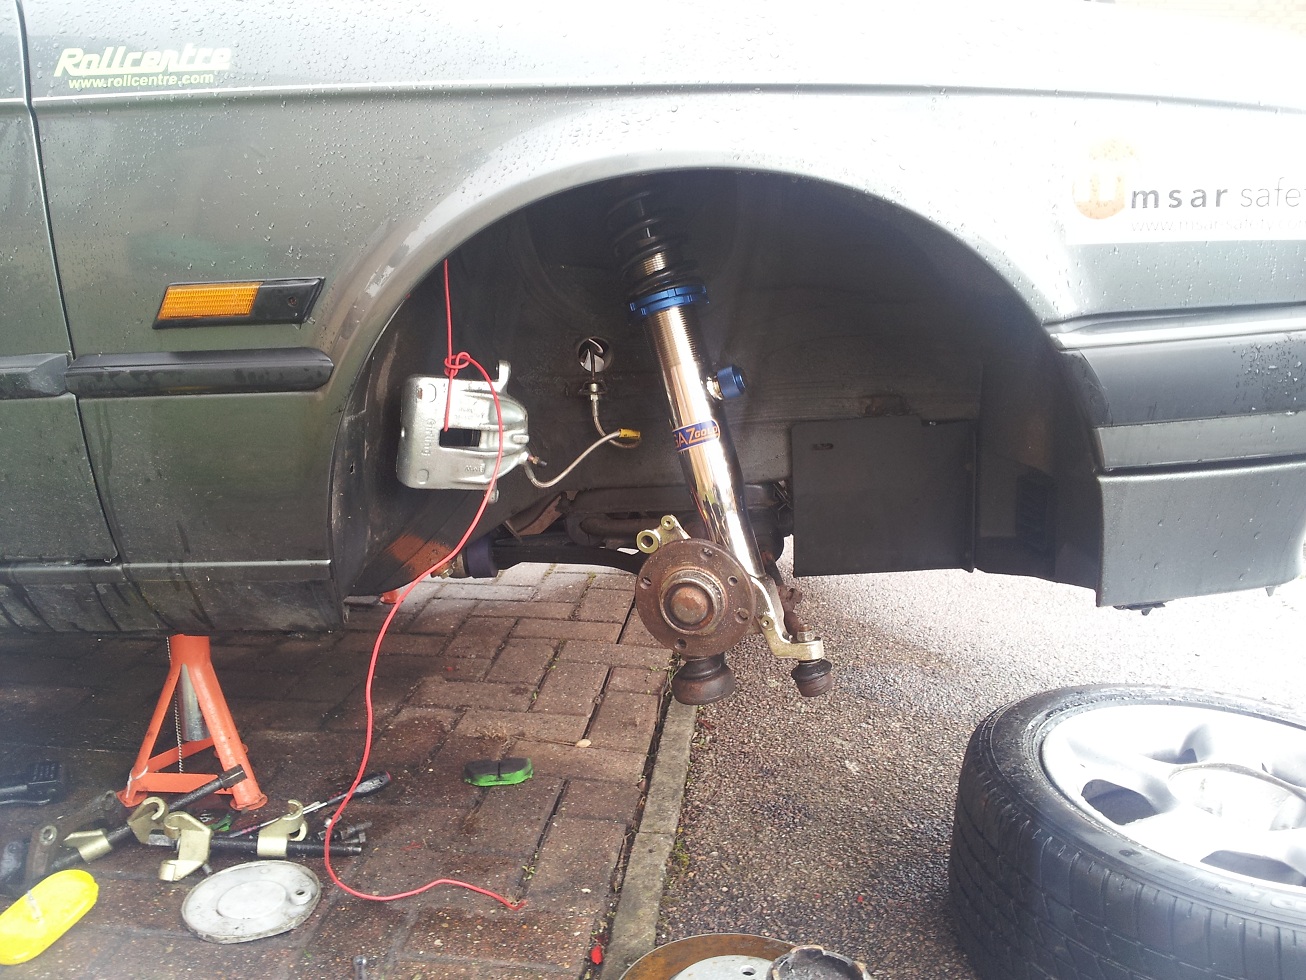
This was how it was shaping up putting the new Gaz dampers on - very nicely indeed. On the other side I spent a lot of time trying to get the control arm joint of the strut and like I said, destroyed my rubbers in the process. Enlightenment came when my neighbour Will turned up with a scissor type seperator. You keep turning a bolt and it pushes the ball joint bolt down levering against the bottom of the arm. The seperation took seconds, and marked it's fanfare with a very satisfying metalic bang. So my advice in the sea of ball joint advice is very simple: you need one of these tools in your life!
The next problem was the top mount nuts:
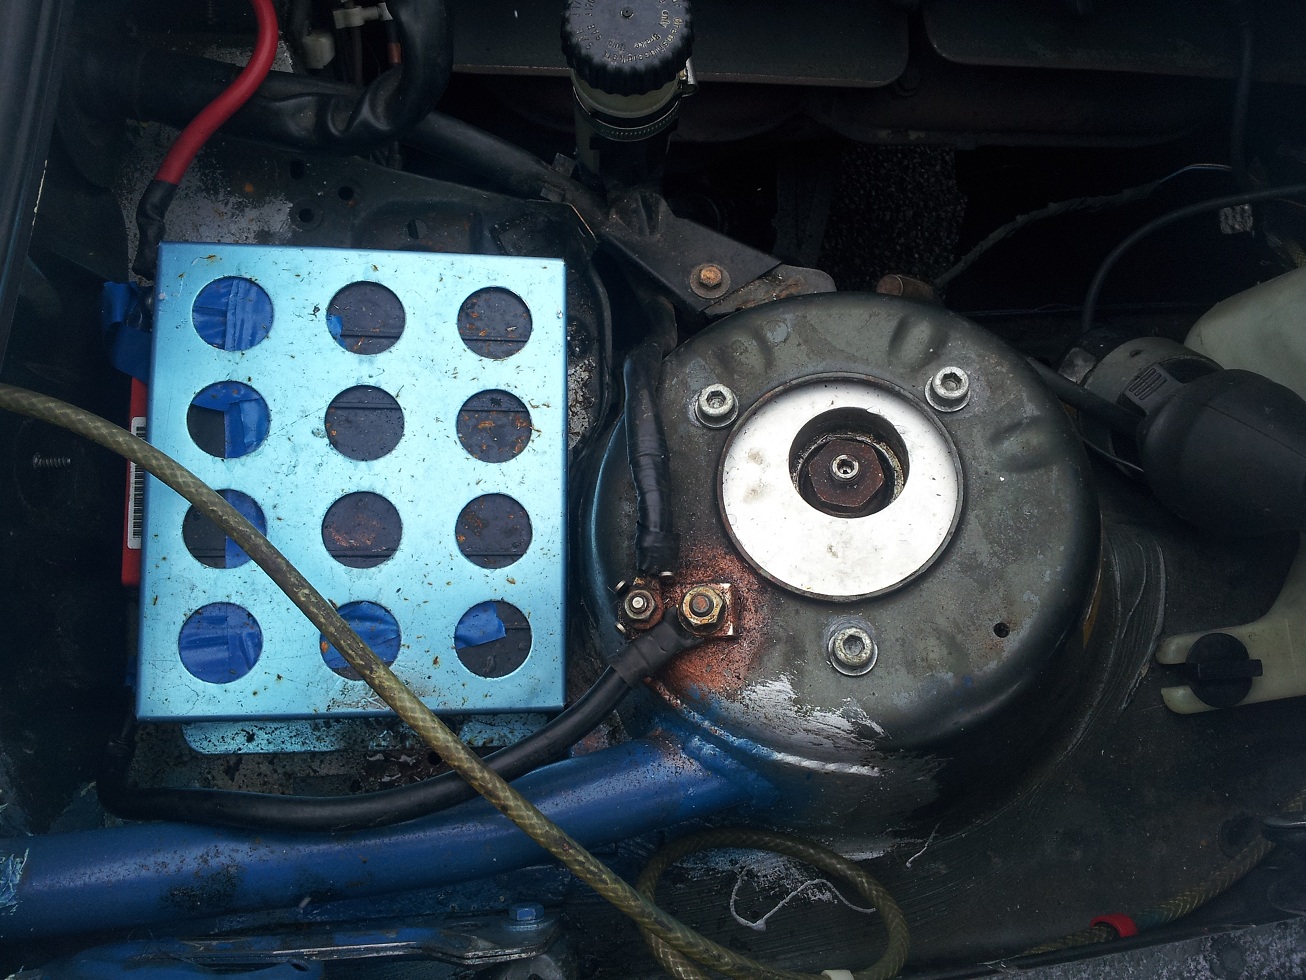
I've just noticed how messy the bay is and my cheap electrical tape does not cover the battery terminals - something to do with me needing to take them off to give the car a jump start! I'm already wondering if I can fashion some sort of easy access positive terminal in my B&Q junction box behind it's screwed in waterproof cover. But anyway, I digest.... (FG)
Firstly I slightly reamed out the three mouting holes as the top mount wouldn't line up. I probably should have gone for a bit more inward negative camber here but I measured the reaming out to the top mount holes that looked like they'd been used by the previous E30 race car. I'll probably adjust and on the next available fitting holes the mount will bring the top more rear giving a bit more castor. But that wasn't my biggest worry. As I've seen on various searches, many people have issues tightening the top mount main nut on coilovers, and I was no exception.
After realising that I could keep the strut from turning with an allen key, and turn the nut with a 25 mil ring swan necked spanner (which I couldn't find locally for love nor money!), another E30 zone member popped up with a better solution - an impact driver. I'd already tightened as much as possible using mole grips on the top part of the shaft which wouldn't travel past the damper seals, but the passenger side could not be tightened very well. Unsuprisingly, on the test drive I'd get a knock noise rom that strut going over bumps, reminding me of my early days in my MK3 Golf. When we tried the impact driver method it became apparent that the circular shoulder of the nut was grinding in the spherical bearing stopping it from easily going in. A bit of "surgery" on the nut, and she was in tightly - huge relief. However, I didn't even get chance to start my drive slowly on the back roads back, because it was instantly obvious the front was now ready to play ball. And that's the first time it really hit me how much of an improvement all 4 corners were - even on my badly set up "stilts" suspension setting and slightly wonky tracking!
Fun doesn't even come close to describing the car now after all this messing with rear beams bushes, a dog's dangly bits roll cage stiffening the car, powerflex control arm bushes and finally Gaz coilovers. It's instant connection with the road - even a snowy / wet pot holed ridden one! I utterly loved the drive back, and can't wait to round off the edges of my bodged set up to a decent aligned lowered spec.
Rear E30 Coilovers
- Details
- Hits: 8823
So now we get on to the "sexy" topic of suspesnsion. Some readers might be quite appalled to see I'm spending as much time on this subject as I am on wiring, bonnet pins and other tedious stuff. Fact is I find everything on this car is actualy quite fun to work with*
*ok some are not so fun...
Over the weekend I got stuck in to my coilovers starting with the backs (sorry rears - still in rugby mode!). I bought used Gaz golds with top mounts from the E30 zone and got plenty of after sales advice - cheers Brian. The biggest time consumer was working out where the sleeves went, either top mount end or bottom bolt end. It turned out both and the chap found the bottom sleeves and replacement bolts posted them in great time.
Here's how I thought they should go-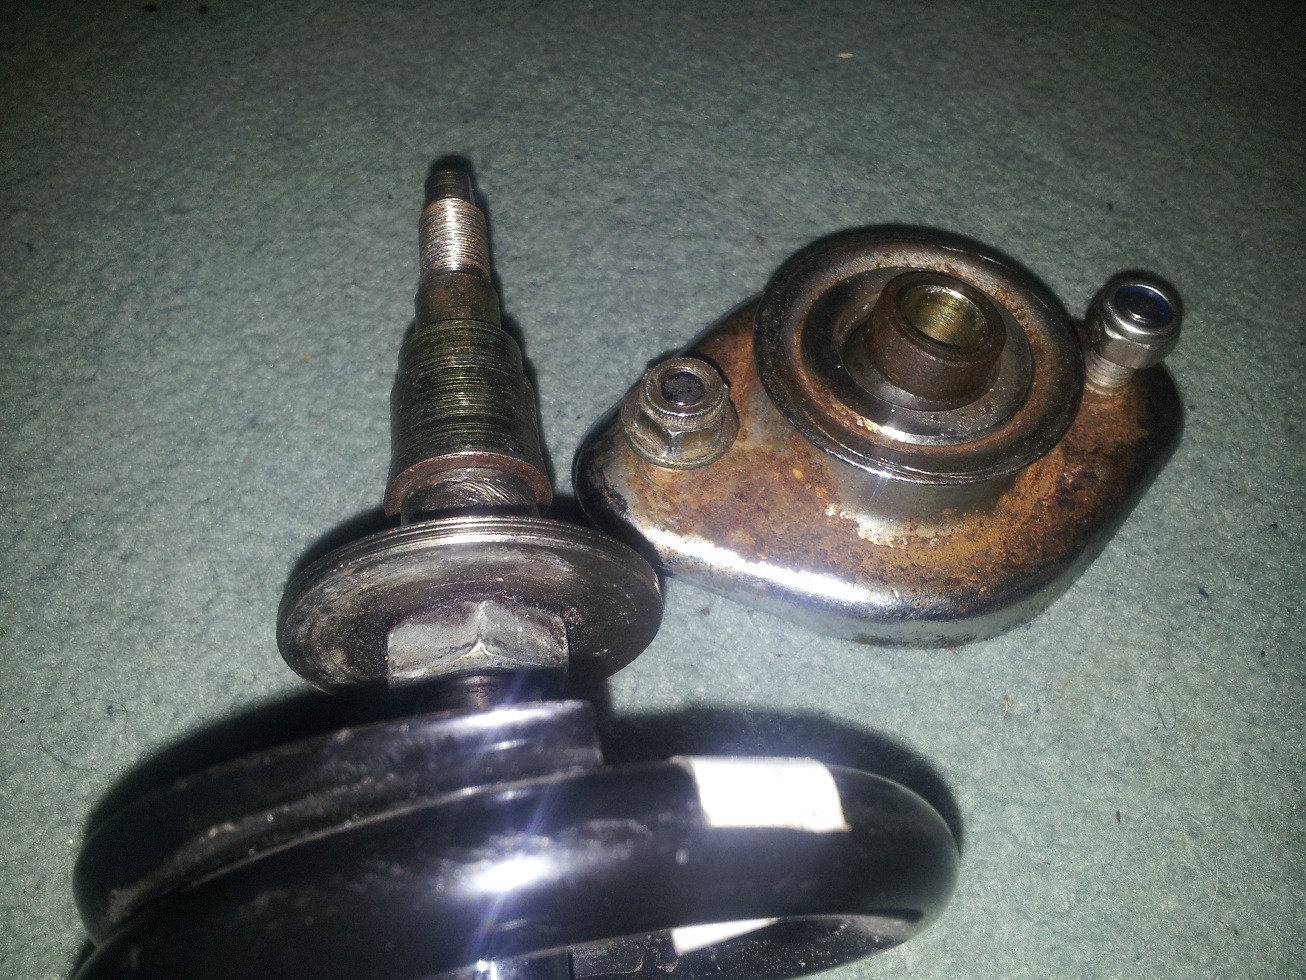
HOWEVER, its best to use the bigger sleeve spacer at the top.
This is the top mount and test fit without sleeves - still working out what goes where at this point!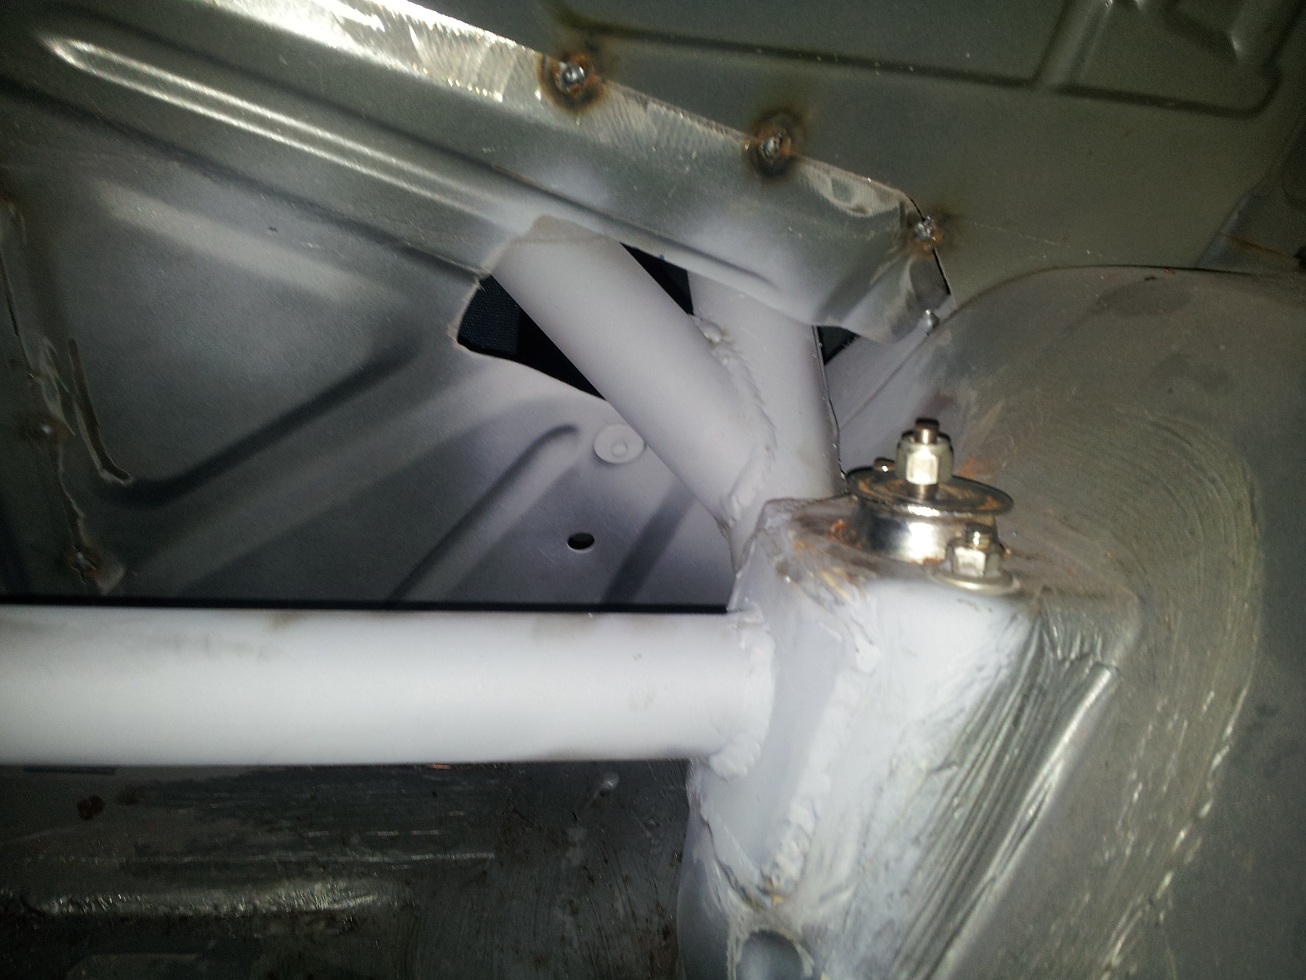
And then...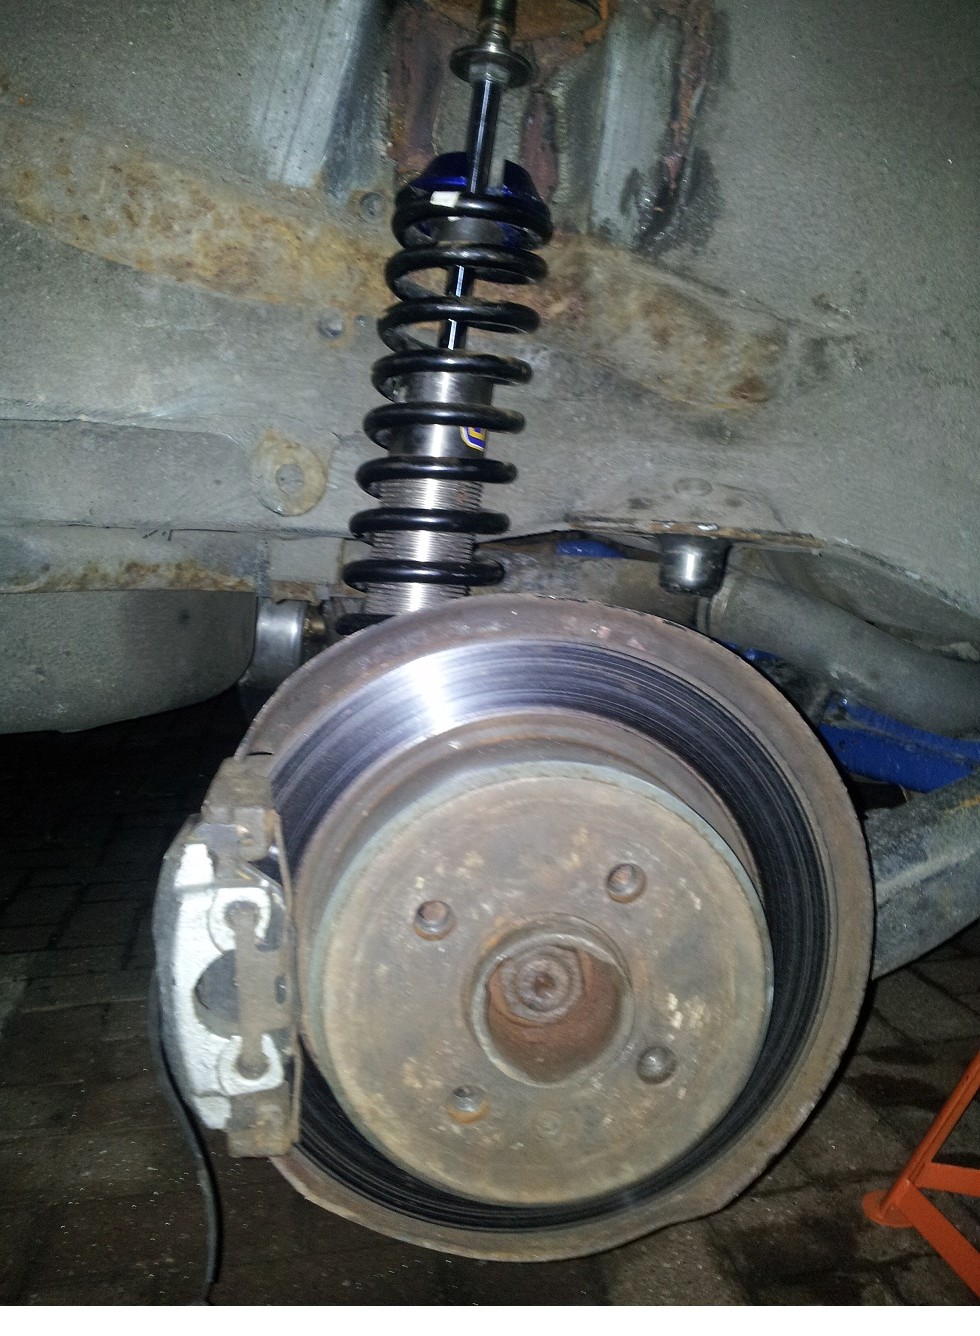
There's a lot of talk around the rears needing helper springs or something, so the damper when fully extended goes back to it's original position. I found it lowers just fine. The spring does rub slightly this side so I will be getting some offset top mounts to clear the spring away from the body, and selling the old ones.
The rears in total I managed to finish either side of 6 hours of 6 nations rugby in a day, even with a bit of stomach "issues". So the rears are dead simple. The fronts however... not so.
My lesson learnt for that day however was to set the ride height correctly on the coilovers before lowering the car off the stands! I thought I'd gone I thought for plenty of height, but I'd actually gone for not a lot of height misjudging where the collars should have been... So when I lowered the car, I had a bit of a shock as the jack was stuck and the wheels were on their arches. So I sorted that and went for practically the maximum height (properly) I could go which is still quite low for me!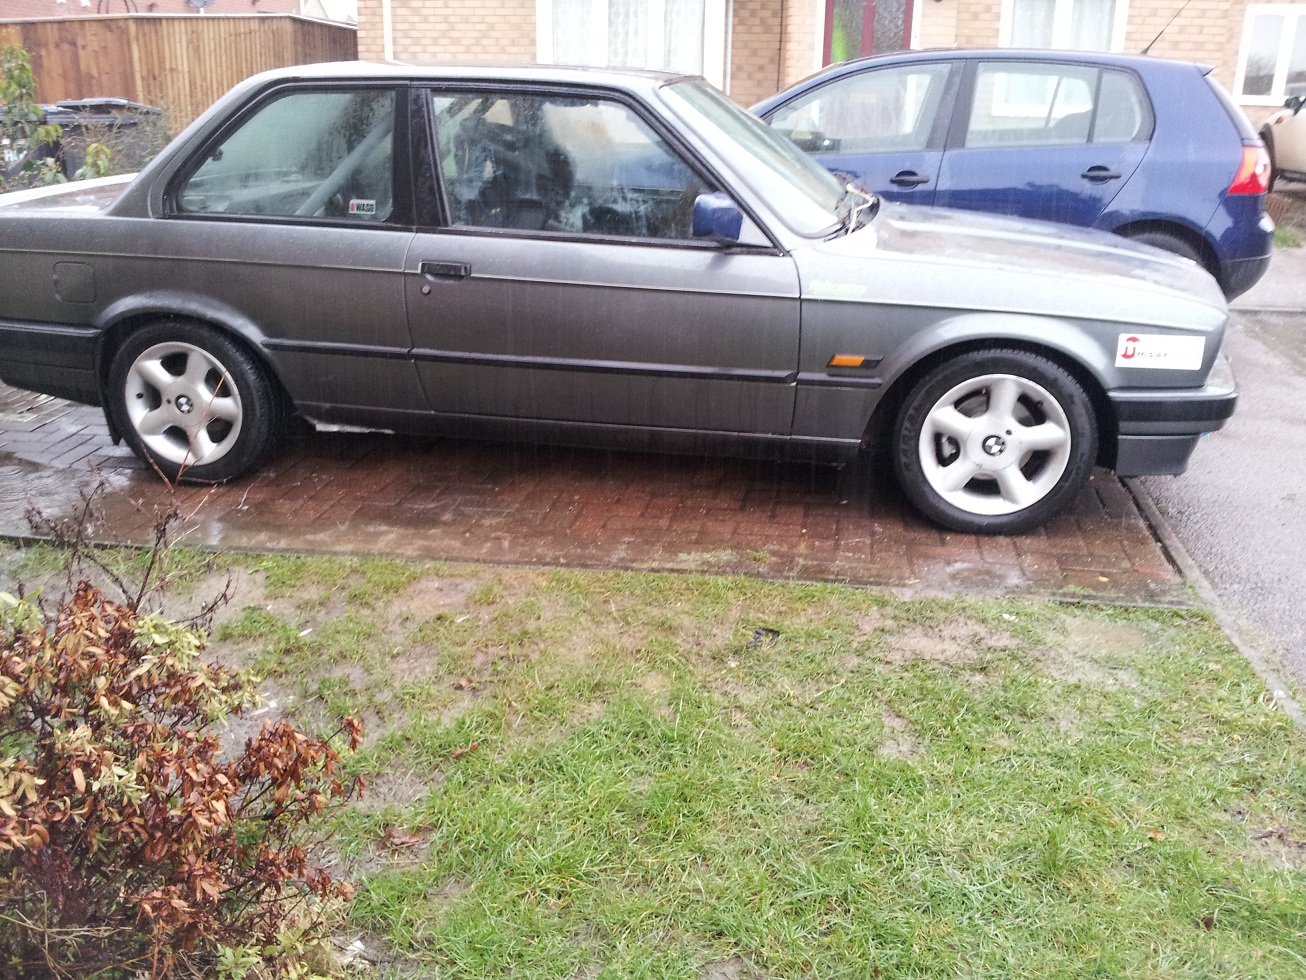
This actually shows after me completing the front driver's side as well as both rears. From this angle at least it looks done(!) And yes of course I worked through the rain, to a point.
I went for a tenatitive test drive, after going back and forth on the road, to ensure all was well. At this point just the rears have been changed. When I got up to speed it was massively obvious how much more communicative the rear is. I went over some speed bumps to make sure everything was bolted on properly, played with the throttle and brakes and all was well. Interestingly on a wet road, wow the rear wheels are easier to light up now - it's instant o-demand wheelspin! No wonder you hear about inboard springs a lot for these track cars.
